Photo: OPI Professionals
W
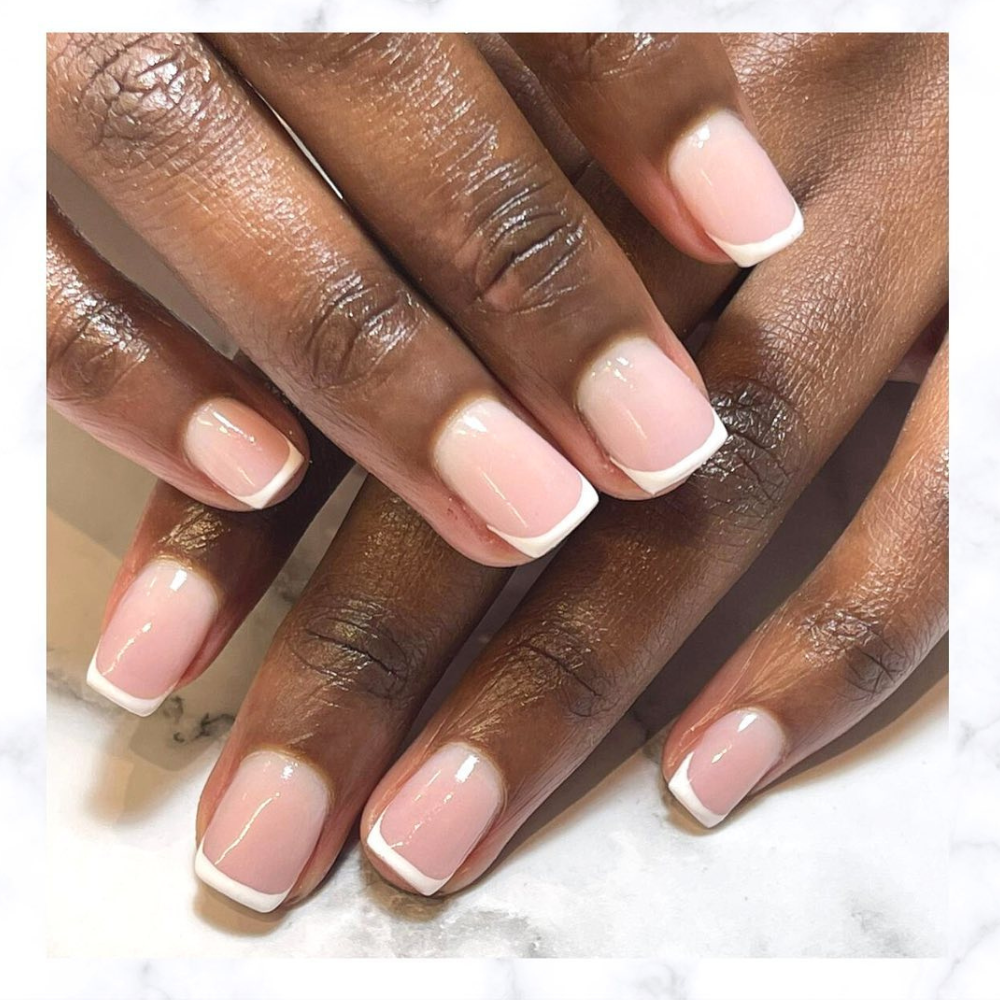
hile fixing long nails with heavy embellishments has been a pleasurable trend for some, others stay faithful to short clean nails. Minimalism is the school of thought that says an understated manicure with a clean finish is enough to get your classy side on. If you prefer quiet luxury, then a micro French manicure is for you as it gives your nails a subtle refined finish. Unlike the classic French manicure with thick white tips, this approach features a thin line of color at the tip of your nails to render a delicate touch.
Check out how to achieve the micro French manicure…
- Step 1: Gather your supplies – Start by getting everything you need. You’ll need a clear base coat, a base color (like a soft pink or nude), a color for the micro tips (usually white or a pale color), a clear top coat, a thin nail art brush, nail polish remover, cotton balls or pads, and a nail file.
- Step 2: Prepare your nails – Make sure your nails are clean. If you have old nail polish on, use the nail polish remover and cotton balls to remove it. Then trim your nails to your desired length, and shape them with the nail file. Short nails work well for the micro French manicure.
- Step 3: Apply the base coat – Start with a clear base coat. This serves as a primer for your nails. Apply a layer evenly on each nail and let it dry completely. This helps your manicure last longer.
- Step 4: Paint your base color – Choose a soft color like pink or nude for your base and spread one or two coats evenly. Allow the first coat to dry before you apply the next.
- Step 5: Create micro tips – To create the perfect micro French manicure, give attention to this step. Use your thin nail art brush and dip it into a white or pale color coat. Then carefully draw a thin line across the tip of each nail. You want it to be very thin like the edge of a paper. Keep your hand steady and take your time.
- Step 6: Perfect your lines – If your lines aren’t perfectly straight or neat, you can touch them up with the base color or a bit of nail polish remover on a cotton swab. Approach this step with care so as not to distort the base polish, especially if you’re using a nail polish remover.
- Step 7: Apply the top coat – To seal in your beautiful design and make it last, apply a clear top coat. This adds shine and protection.
- Step 8: Clean up – Once your nails are completely dry, use a cotton swab dipped in nail polish remover to clean up any stray polish around your nails. This gives your manicure a perfect finish.
Few tips to remember for a clean manicure
- Moisturize regularly: Keeping your cuticles and the skin around your nails moisturized is essential. Dry skin can make your manicure look less polished. Use a cuticle oil or moisturizing hand cream daily to keep your nails and hands hydrated.
- Use a gentle hand wash: When washing your hands, use a gentle soap. Harsh soaps and hot water can dry out your nails and make your manicure chip more quickly. Opt for lukewarm water and mild hand soap.
- Wear gloves for chores: Household chores like washing dishes or cleaning can be harsh on your manicure. Protect your nails by wearing gloves. This prevents water and chemicals from weakening your nail polish.
- Avoid nail biting or picking: Break the habit of nail biting or picking at your nails. Not only can it ruin your manicure, but it can also damage your nail health. Try using a bitter-tasting nail polish to deter nail biting.
- Be mindful of activities: Remember that your nails are not tools. Avoid using them to open cans, scratch-off stickers, or any other tasks that can put stress on your manicure.
- Remember quick fixes: Keep a small bottle of your base color and the micro tip color handy for quick touch-ups. Small chips or imperfections can be easily fixed with a bit of polish and a steady hand.
- Reapply top coat: To prolong the life of your micro French manicure, add a fresh layer of clear top coat every few days. This helps maintain the shine and protect the design.
- Avoid excessive heat: Exposure to excessive heat, like hot baths or saunas, can cause your nail polish to peel or chip. Try to limit prolonged exposure to high temperatures.
- Be gentle during removal: When it’s time to change your manicure, be gentle when removing the polish. Soak a cotton ball or pad in nail polish remover, press it onto your nail for a few seconds, and then gently swipe it off in one direction. Avoid aggressive scrubbing, which can weaken your nails.
- Don’t forget regular maintenance: Plan to touch up your micro French manicure every 7-10 days. This can help keep it looking pristine.
Featured image: @opi_professionals/Instagram
For the latest in fashion, lifestyle, and culture, follow us on Instagram @StyleRave_
All rights reserved. This material, and other digital content on this website, may not be reproduced, published, broadcasted, cached, rewritten, or redistributed in whole or in part without prior express written permission from STYLE RAVE. Use of and/or registration on any portion of this site constitutes acceptance of our Terms & Conditions and Privacy Policy.
—Read also